Key Highlights
- Learn about self-hosted WordPress and how it differs from WordPress.com.
- Discover the cost-saving benefits and flexibility of managing your own website.
- Follow our step-by-step guide to set up your self-hosted WordPress website.
- Get expert tips on choosing the right hosting provider and domain name.
- Explore essential WordPress settings and best practices for creating engaging content.
Introduction
In today’s digital world, having a strong online presence is very important for both people and businesses. WordPress is a flexible and powerful system that helps you build beautiful websites and blogs easily. If you want full control over your online presence, self-hosted WordPress is the best choice. This guide provides you with the tools and knowledge to start your self-hosted WordPress journey. It will open up many possibilities for your online projects.
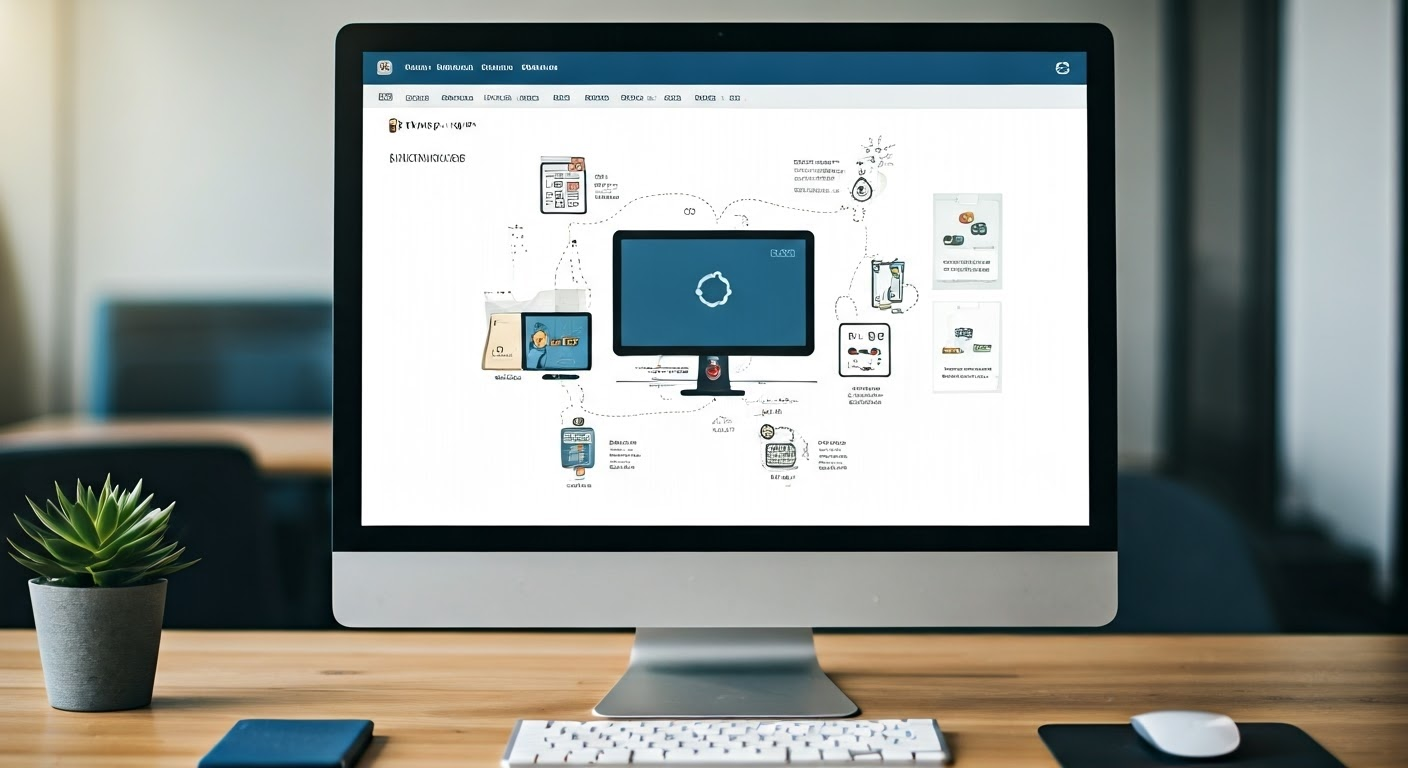
Understanding Self-Hosted WordPress
Before we start the setup process, let’s first understand what self-hosted WordPress means. It means you take control of your WordPress website.
This is different from using the hosted WordPress.com platform. With self-hosting, you need to pick a web hosting provider. You will also handle technical tasks like updates, security, and backups. But don’t worry; it is not as scary as it seems!
Defining Self-Hosted WordPress
Imagine having your own digital space. That is what a self-hosted WordPress site can do for you. It gives you the chance to:
- Use Your Own Domain Name: Instead of having yourwebsite.wordpress.com, you can have www.yourwebsite.com. This makes your online presence more professional and easier to remember.
- Choose Your Hosting Provider: You can pick a hosting company that fits your budget and needs. This gives you control over where your site is hosted.
- Design Your Site the Way You Want: With self-hosting, you can fully personalize your WordPress site. You will not be stuck with the limits of other hosted platforms.
Why Choose a Self-Hosted WordPress Site?
The choice to go self-hosted comes down to having control, flexibility, and saving money long-term. Here are the reasons why:
- Complete Control: You have full control over your site’s data, design, and features. You can install any plugin, change the code, and shape everything to fit your needs.
- Better Visibility to Search Engines: Self-hosted sites provide improved Search Engine Optimization (SEO). This helps Google and other search engines find and rank your content more easily.
- Make the Most of WordPress Software: You can explore the wide range of themes, plugins, and customization options that WordPress offers, without any limits.
Benefits of Going Self-Hosted with WordPress

Venturing into self-hosted WordPress has many benefits. It allows you to use the full power of this popular platform.
Let’s look at the strong reasons why self-hosting is a great choice for website owners:
Full Customization and Control
One of the best things about self-hosting is the freedom it gives you.
- Choose the Right WordPress Theme: Look through many free and paid themes to change your site’s design right away. Whether you want a simple blog or a lively online store, you can find a theme that fits your style.
- Make a Unique Design: If you want something special, self-hosting lets you change your theme’s code or create a brand new design just for you.
- Enjoy Full Control: With self-hosted WordPress, you have complete control over how your site looks and works. This level of customization is not available with hosted platforms.
Enhanced SEO Capabilities
For people wanting to succeed in search engine rankings, self-hosted WordPress is a great choice. It helps you use advanced SEO tools and strategies that can really improve your site’s visibility.
- Use Strong SEO Plugins: Use well-known plugins like Yoast SEO to improve your content, get better meta descriptions, and create XML sitemaps. These things can help you rank higher in search engine results pages (SERPs).
- Speed Up Your Site: Keep your site’s performance in check since it’s an important factor for ranking. Use caching, optimize your images, and pick a fast hosting provider to make sure your pages load quickly. This makes both users and search engines like Google happy.
- Easy SEO: Self-hosting gives you the tools and control you need to increase your site’s organic reach and bring in more visitors.
Preparing for Your Self-Hosted WordPress Journey
Starting your own self-hosted WordPress journey requires some important steps. You can think of it like collecting the right tools and materials before building your dream website.
When you take time to plan and gather what you need, you will be ready to build a strong online presence.
What You Will Need to Get Started
Before you start with self-hosted WordPress, make sure you have these important things ready:
- A Domain Name: This is your website’s address on the internet, like www.yourwebsite.com. It’s best to have a name that is relevant and easy to remember for your branding.
- Web Hosting: Think of web hosting as the digital space where your site’s files and data live. It is very important to choose a trustworthy hosting provider. This affects your site’s speed, safety, and how well it works overall.
- A Hosting Plan: Hosting companies provide different plans for various needs and budgets. Take your time to look at your needs regarding storage space, bandwidth, and extra features. This way, you can pick the best plan for your site.
Choosing the Right Web Hosting Service
Choosing the right web hosting service is like picking a good base for your house. It is very important for your website’s success. With many hosting companies to choose from, think about these points:
- WordPress-Specific Hosting: Some providers focus only on WordPress hosting. They have servers and features made just for WordPress.
- Reliable WordPress Hosting Service: Look for companies that are known for being dependable. They should have good uptime and quick customer support.
- Reviews Are Your Friend: Take some time to read reviews from other WordPress users. Picking a hosting provider that others trust is a smart move.
Step-by-Step Guide: Setting Up Your Self-Hosted WordPress Website
With everything set, we can now get to the fun part – making your self-hosted WordPress website.
Just follow these simple steps to bring your website to life:
Step 1: Registering a Domain Name
First, you need a domain name. This is the address people will type in their web browser to find your site. It helps you create your online identity.
- Brainstorm a Catchy Site Name: Pick a domain name that fits your brand or website purpose. It should be easy to remember, spell, and should be short.
- Check Availability: Many hosting providers can help you register a domain. Type in your desired name to check if it’s available. If it’s not, think of creative alternatives.
- Claim Your Own Domain Name: After you find a domain name that you like and is available, register it. This secures your online address.
Step 2: Selecting a WordPress-Compatible Web Hosting Provider
Your next step is to pick a hosting provider for your WordPress website. This choice can affect your site’s speed, security, and overall success.
- Choose a Good Hosting Provider: Find a web host known for strong and reliable services.
- Make Sure It’s Good for WordPress: Check that the host you choose has plans that work well with WordPress.
- Take Your Time to Find the Right Host: Compare different plans, read reviews, and contact customer support if you have questions before you decide.
Step 3: Installing WordPress on Your Host
With your domain and hosting set up, it is time to install the WordPress software on your server. Luckily, most hosting providers make this easy.
- Look for One-Click Installation: Choose a provider that has one-click WordPress installation in their control panel, like cPanel. This makes it very simple.
- Use the WordPress Software: If your host does not offer one-click installation, they usually provide clear steps on how to install WordPress manually.
- Start the WordPress Installation: To install, connect your domain to your hosting account. You will also need to create a database for your site and set up a few basic settings.
Step 4: Designing Your Website with Themes
Now, let’s have some fun! You can give your website a unique look that shows off your brand. WordPress themes are ready-made designs that set how your site looks.
- Explore the WordPress Theme Directory: Start by looking through the large collection of free themes in the WordPress Theme Directory. You can find this right in your WordPress dashboard.
- Free or Premium, the Choice is Yours: Free themes are a great way to begin, but premium themes usually have more options for changing things, advanced features, and better support.
- Transform Your Site’s Design: After you find a theme you like, install and activate it. This will instantly change your site’s design.
Step 5: Extending Functionality Through Plugins
Plugins are like apps for your WordPress website. They help you add new features and functions without needing to code.
- Plugins Improve Your WordPress Blog: You can find plugins for many things, like contact forms, SEO tools, social media links, and e-commerce options. There is a plugin for almost everything.
- Check Out Plugin Features: You can look at the wide range of plugins in your WordPress dashboard. You can also look at popular third-party sites for more choices.
- Customization Is Important: Installing and turning on plugins is usually easy. This makes it simple to customize your WordPress website and improve its functionality.
Budgeting for Your Self-Hosted WordPress Website
Starting your own self-hosted WordPress website does come with some costs. But don’t worry. Self-hosting is usually a more affordable option in the long run when you compare it with website builder platforms.
Now, let’s look at the costs involved:
Understanding the initial investment
Transitioning to a self-hosted WordPress site requires an initial financial outlay, but understanding the essential components can help you budget effectively:
- The Foundation: Hosting Plan: The primary expense is your chosen hosting plan, with prices varying based on factors such as storage, bandwidth, and features. Opting for an annual plan usually yields savings compared to monthly payments.
- Your Online Address: Domain Name: Registering a domain name is typically an annual fee, but some hosting providers offer free domain registration for the first year as part of their hosting packages.
- Optional Enhancements: Themes & Plugins: While free options are readily available, you might consider investing in premium themes or plugins for enhanced features or design flexibility. This is an optional cost depending on your specific needs and preferences.
| Cost Item | Estimated Price Range |
| Shared Hosting Plan | $3 – $10 per month |
| Managed WordPress Hosting Plan | $15 – $100+ per month |
| Domain Name Registration | $10 – $15 per year |
| Premium WordPress Theme (optional) | $30 – $100+ one-time or annually |
| Premium WordPress Plugin (optional) | $15 – $200+ per plugin |
Monthly vs. yearly costs
When you look for hosting, you will find both monthly and yearly payment options. Each choice has benefits and drawbacks. So, it is important to choose what fits your budget and needs best:
- Hosting Plan Commitment: Yearly plans usually come with lower rates than monthly ones. This makes them a better deal over time if you plan to keep your site.
- Budget-Friendly Alternatives: Monthly plans can offer more flexibility. This is great if you have a tight budget or don’t want to commit to a long-term plan right away.
- Good News: Adaptability: The good news is that many hosting providers let you switch between monthly and yearly plans. This gives you the chance to adjust your budget or upgrade as your site grows.
Hidden fees to watch out for
While many hosting providers try to be open about their costs, you should watch for hidden fees that can unexpectedly increase your costs.
- Check Your Hosting Provider: Look closely at the terms of service and pricing details before you choose a hosting provider. Make sure to note the renewal rates, as they may be different from the original price when you sign up.
- Domain Costs: Remember that some hosts may give you a free domain for the first year, but they may charge you a fee for renewal in the following years. Also, if you want to move your domain to another registrar later, there could be a charge.
- Email Accounts: Some hosting plans include email accounts with your domain, but others may require an extra fee to set up and keep these email accounts.
DIY vs. hiring a developer
The choice to build and manage your WordPress website yourself or hire a developer relies on your skills, budget, and how complex you want your site to be:
- Ease of Use: WordPress has a simple design. Many people find it easy to set up and manage their websites on their own.
- Weighing the Costs: Hiring a developer can bring in professional help. But it will also increase your costs. If you have no technical skills or time for managing a website, it might be good to think about getting professional help.
- The WordPress Setup Process: With WordPress being so easy to use, even people with little technical knowledge can set things up. There are many tutorials and guides online to help you through the process.
Budget-friendly alternatives to premium themes and plugins
While premium themes and plugins have great features and support, you can still create a nice website without spending a lot of money. Here are some ways to do this:
- Explore Free Options: The official WordPress site has many free themes and plugins that are good enough for basic needs.
- Benefit From Open-Source Solutions: Find free themes and plugins from trusted developers and communities. They are usually updated often and work well.
- Consider Budget-Friendly Alternatives: Instead of paying for a premium theme right away, look for free themes that let you make changes or have paid upgrades for features you might want later.
The long-term savings of self-hosting vs. using a website builder platform
While website builder platforms may look appealing because they are simple and often come with free starter plans, choosing self-hosting can save you money in the long run.
- Control Over Your Expenses: With self-hosting, you have better control over your costs. You can pick hosting plans and services that fit your budget and needs perfectly.
- Breaking Free From Usage Restrictions: Website builders usually set limits on things like bandwidth, storage, or the number of pages you can make on their free or lower-cost plans. This may force you to upgrade when your site gets bigger.
- Self-Hosting Offers Long-Term Savings: Although self-hosting has some upfront costs, it usually leads to saving money over time. You can manage your expenses and avoid the ongoing fees or restrictions that come with website builder platforms.
Essential WordPress Settings for Beginners
Congratulations on installing WordPress! Now, let’s make some important settings to improve your website’s performance and user experience. These small changes can have a big impact.
This section will help you with key settings to begin:
Configuring General Settings
Start by getting to know the WordPress dashboard, especially the “Settings” section. This area helps you change different parts of your WordPress blog:
- Site Identity: Here, you can choose your site’s title, tagline, and logo. These elements help define your site and how visitors see it.
- Customize for Ease of Use: Set the time zone, date format, and language to make sure your content shows up correctly for your audience.
- Optimize Your WordPress Blog: Take some time to check and change these settings to fit your brand and what you like. This will help improve the functionality and user experience of your WordPress blog.
Understanding Permalinks for Better SEO
Permalinks are the permanent URLs for your posts and pages. They are very important for SEO. WordPress has a standard permalink setup, but it’s important to change it:
- Improve SEO: Pick a permalink style that includes keywords linked to your content. This helps search engines to understand and rank your pages better.
- Easy-to-Read URLs: Choose a structure that is easy for people to read and describes the content, using hyphens to separate words. For instance, “www.yourwebsite.com/how-to-bake-a-cake” is better for SEO and easy for users than “www.yourwebsite.com/?p=123.”
- Boost Search Engines: This small change can greatly help your site’s SEO. It tells search engines what your pages are about, helping them show your content to more people in search results.
Creating Your First Content on WordPress
Now that your website is ready, it is time to add exciting content! This could be interesting blog posts, helpful articles, or beautiful galleries. Good content is very important.
This section will explain how to create and publish content on your site:
Best Practices for Posts and Pages
WordPress has two main types of content – “Posts” and “Pages.” They serve different purposes. It’s important to know how they work for good organization of your content.
- Regular Updates: Posts: “Posts” are great for time-sensitive content. This includes blog articles, news updates, or announcements. They show up on your blog page in reverse order, so the newest post is first.
- Static Information: Pages: “Pages” are for fixed content. This includes your “About” page, “Contact” page, or service descriptions. Unlike posts, pages aren’t listed in an order and usually don’t show up in your blog feed.
- Content Is King: Best Practices: To make engaging content, use simple and clear language. Break up your text with headings and subheadings. Add visuals like images or videos to make it better. Most importantly, make sure your content is valuable to your audience.
Organizing Your Content with Categories and Tags
As your website grows and you add more content, it is important to keep everything organized. Categories and tags in WordPress help you group related content. This makes it easier for both you and your visitors to navigate your site.
- Broad Groupings: Categories: Categories help you create broad groups for your content. You can think of them as the main topics or sections of your site. For example, a food blog might have categories like “Recipes,” “Cooking Tips,” and “Restaurant Reviews.”
- Specific Details: Tags: Tags describe specific details in your content. For the food blog, tags for a recipe might be “chocolate cake,” “easy desserts,” or “baking for beginners.”
- Seamless Navigation: Using categories and tags well improves your site’s organization. This makes it simple for visitors to find what they need. It also helps search engines understand how relevant your content is. This could improve how your site shows up in search results.
Maintaining and Securing Your WordPress Site

Maintaining and securing your WordPress site is something you always need to do. This is very important to stop problems and keep your valuable content safe.
Here are some key maintenance and security tips:
Regular Updates and Backups
One of the main rules of WordPress is to keep everything updated. This includes the core software, plugins, and themes. Updates often bring important security fixes and improve performance. If you ignore updates, your site could be open to attacks or have compatibility issues.
- Protection Against Data Loss: Backups: Regular backups are like a safety net. They help you if you accidentally delete something, if your website crashes, or if there is a security issue. A recent backup lets you restore your site to an earlier version, saving important data.
- Secure Your WordPress Site: It is good to use trustworthy backup plugins or the backup services from your hosting provider. You should set up automated backups to run often. This way, you can quickly recover from unexpected problems and reduce the chance of losing data.
Essential Security Measures for Your Website
In today’s world, keeping your website safe is very important. Cyberattacks are getting smarter, so you need to have strong security for your site and data:
- Use Strong Passwords: Make sure to use strong and unique passwords for all your WordPress logins. This includes your admin account, FTP accounts, and database access. Use a mix of uppercase and lowercase letters, numbers, and symbols.
- Make Your WordPress Website Secure: Add two-factor authentication (2FA) to give you extra safety. This means you will need a unique code from your phone or email, along with your password. It helps stop unauthorized access, even if someone knows your password.
- Manage Your Passwords: Change your passwords often, especially for important accounts. You might want to use a password manager to keep your login information safe. This way, you don’t have to remember lots of tricky passwords.
Conclusion
In conclusion, setting up a self-hosted WordPress website gives you great options for customization and SEO. If you follow the step-by-step guide and know your initial investment, you can make a unique online presence. Remember to plan your budget, keep up with security measures, and back up your site often to keep it running well. It doesn’t matter if you are a beginner or moving from WordPress.com. The control and flexibility of a self-hosted WordPress site are perfect for your online projects. Enjoy the journey of creating and managing your website with confidence.
Frequently Asked Questions
Can I Transfer My Blog from WordPress.com to a Self-Hosted WordPress Site?
Yes, you can easily move your blog from WordPress.com to your own WordPress site. WordPress has tools and plugins that make this process simple. You can transfer your content, themes, and plugins to your own domain name and hosting provider.
What are the benefits of setting up a self-hosted WordPress website?
Setting up your own WordPress website has many advantages. You will have full control over how your site looks and works. It also gives you better SEO options to help people find your site. You can choose how to make money from your site. Plus, you will have access to a large collection of themes and plugins to customize it in many ways.
What is the difference between a self-hosted WordPress website and a hosted WordPress.com website?
The main difference is about hosting and control. With a self-hosted WordPress website, you own the hosting and domain name. This means you have complete control. On the other hand, a WordPress.com website is hosted on their servers. This setup gives you less flexibility and control.
What are the essential steps to set up a self-hosted WordPress website?
The important steps include picking a hosting provider. Then, register a domain name. Next, install the WordPress software on your server. After that, choose a theme and customize your website with plugins and content.
What factors should I consider when choosing a web hosting provider for my self-hosted WordPress website?
When you choose a web hosting provider, focus on important factors. These include reliability, uptime, speed, and customer support. Also, look for security features and server resources. If possible, get specialized WordPress hosting. This comes with better settings and support for your needs.