Leading is no easy feat. Whether in a 9 to 5 management role in an office, or as a proprietor of a small, independent business, there are necessary skills that must be developed for a prosperous career. Considering CEO compensation has grown by 940% since the year 1978, there is plenty of motivation to strive for more. However, success isn’t the only concern; a positive sense of wellbeing also contributes to a stable, long-term career.
However, for any young professional who is beginning a new endeavour, identifying the necessary skills of effective leaders can be just as difficult as fostering these qualities. Luckily, many top skills don’t have to be developed by attending expensive conferences in big cities. In fact, there are dynamic solutions to be found in everyday life that help nurture the leader within.
Necessary Traits in the Office
Forbes recently listed their number one leadership skill as ‘fearless agility’. Games like chess, poker, and sudoku all help develop mental stamina and analytical skills that aid in quick decision-making. In fact, scientific research has shown that poker can stimulate the brain and enhance the mind; while playing chess has been linked to increased efficiency in problem solving for players. Sudoku, on the other hand, benefits the memory, while also stimulating the brain like poker.
These everyday activities can also help develop three more skills noted in the Forbes list: flexibility, learning quickly, and versatility. However, skills such as empathy, selflessness, humility, and listening (also on the list) may seem a bit less applicable. These skills present a divide between ‘Type A’ and ‘Type B’ people; Type A being predisposed to logical mental processes and Type B being more apt to use intuition to gain insight and understanding.
One quick solution for bridging Type A and Type B traits is to study body language to aid in employee interaction. There are ample resources, from books to online courses that can help an individual develop skills like empathy, selflessness, and listening skills. By gaining an awareness of the body, a leader can connect with employees and partners more seamlessly, as well as boost their own image.
Another list of top leadership traits focuses on self-development, which is also a great method for nurturing the trailblazer within. By creating opportunities for themselves, a leader will ‘lead by innovation’. That is, those working with the boss can learn from their example.
Having a positive, ‘can do’ attitude will also go a long way, as workers are more apt to thrive in a positive environment. After all, the American Psychological Association estimated in 2015 that 60 to 80% of workplace accidents were due to stress.
Leadership Skills
Developing a Sense of Leadership
To be confident enough to lead with the traits listed above, a leader must first analyze themselves to understand their motivations and natural aptitudes. In other words, it’s important to ask the question: what kind of leader do you want to be?
Some individuals are more apt to use a democratic approach, while others may prefer to coach or even command their employees. Then there are leaders who stick to their own vision and let others follow suit at their own pace. There are no right or wrong paths, but each situation calls for a thorough answer.
Learning about the self is crucial if a leader is to thrive, but learning about the self can be an abstract concept that’s not easily applicable to the workplace. If a person can identify their own weaknesses and strengths, they’ll be able to explore areas for necessary development.
One easy way for any adult to get back in touch with their inner self is to try the “Yes Challenge”. The “Yes Challenge” has been popularized through social media, and most people associate it with crazy antics. However, the challenge, which requires an individual to agree to any proposal given within a certain time period (within appropriate boundaries), is designed to get people out of their comfort zone. Budding leaders will benefit greatly from small exercises like this, during which new perspectives and insights can be gained about their own natural aptitudes and weaknesses.
Share on facebook
Share on twitter
Share on linkedin
Share on whatsapp
Share on reddit
Lead Generation Problem For You And Me
Turning leads into paying customers is challenging for every Internet marketer. You spend money and effort to drive leads to your landing page only to see that the traffic falls off right before turning into hot paying customers. When this happens, you waste hundreds if not thousands of dollars on ads just to see the sales going downhill.
I’ve been through this as well and it suck. I wish there is a better word than this but there isn’t. I hate wasting the money go down the drain and feeling helplessly for now being to do anything about it.
I have seen colleagues, friends and peers spending even more money hoping to get the sales rolling in but every lead that comes through sales funnel will just fall off the chart. Well, something might be wrong!
If you are not able to generate enough sales within a certain period of time, you are going to lose your marketing budget (and some sanity). It wouldn’t take long before you run out of cash and have to scrap the entire marketing campaign.
Every challenge we face can be a turning point in our lives if we consider it as an opportunity — Unknown.
An Opportunity In Lead Generation
It was back in 2018 when I first realized that I had a problem with my funnel system. I was an inspiring Internet Marketer and doing decently well on a monthly basis.
I felt that I could solve all the problems … except for one.
I couldn’t convert ENOUGH people when they are in the sales funnel and I don’t understand why.
I went through the hours watching lead generation videos on YouTube and even got myself some courses on lead generation.
I believe I was fortunate to came across Russell Brunson’s video on the 1-funnel away challenge.
At that point, I was like … “Man, I don’t need this. I already have several funnels set up.”
But since it didn’t cost much and his Click Funnels software has a 14 days trial, I jumped in because there is nothing to lose. I could cancel on day 13 and I should be golden.
The Ah-ha Moment In Lead Generation
When I first logged in to Click Funnels, I was like “Wow, this is pretty easy to use.” Mind you, I was an early user for OptimizePress and prior to Click Funnels, OP was my go-to funnel builder.
It took me about an hour to run through the Click Funnels backend and creating my first funnel.
Now, here’s where the magic happen.
Click Funnels is setup with ready-made funnels—you know, funnels that you can copy and paste straight into your sales funnel. Since I had scripts for my sales funnels, I decided to do some tweaking and hit the start button on Click Funnels.
Click Funnels is NOT a traffic generation tool. You need to feed traffic to Click Funnels and watch the magic happens.
I loaded up $300 in Facebook Ads and fire up the ad and funnel sequence.
And then, BOOM!
It started with one sale (within the first hour).
And the second one.
Third one.
Little did I know, the ad was running around 12 hours and I hit 25 sales.
I had NEVER experienced such before and I decided to dive deep INTO the funnels I had copied and paste in Click Funnels.
Traffic Secrets
Learn how to fill your website with your dream customers
Click Here
Click Funnels God’s Features
Right off the bat, I noticed that Click Funnels has an upsell and downsell option—one that is not available in most funnel builders at that moment.
Having an upsell allows me to double/triple my sales value and downsell allows me to still get a small portion of profit (while slowly nurturing the buyers into buying higher value products at a later time).
The second part to Click Funnels’s success is the ability to analyze landing page by landing page and from one funnel stage to another.
Ladies and gentlemen, this is golden. Really.
With Click Funnels, I can clearly see where my readers are falling off—and do the needed adjustment to get them progress throughout the funnel.
Working on parts of the funnel allows me to make my advertising budget work harder for me. In other words, I have lesser falloffs during the funnel which translates to higher sales opportunity and revenue.
Last but not least, Click Funnels has truckloads (plural) of raving fans. If you think this doesn’t matter in lead generation, you are dearly wrong.
The Click Funnel Facebook Group is swarming with feeds and updates. At any point you need help with Click Funnels, publish a post and you will get real help from real customers.
There are two takeaways on this last feature:
This product rocks (thus the raving fans)
Support is always a click away
What Are Other People Saying About Click Funnels?
I felt this is an important part in this Click Funnels review write up. You probably have heard too much of my love for CF, so here is a glimpse of what others are saying.
Button Line: Click Funnels works with all businesses who want to sell online. It can be a low priced item such as a shaver or a high priced group coaching that costs over $10,000. Click Funnels works and the best way to experience Click Funnels is by trying out yourself. Here’s 14 days free trial for you to start with zero risk.
How Much Does Click Funnels Costs?
The latest Click Funnels pricing comes in two tiers (the third tier is on the way).
Click Funnels Basic, $99 per month. This is the basic version to get you start generating sales through properly setup funnels—from an intuitive drag and drop builder to adding custom domains. The beauty of Click Funnels is the ability to perform payment on behalf of you. Instead of paying a hefty fee to third party payment providers such as PayPal, you can use Click Funnels inbuilt payment gateway.
Click Funnels Platinum, $297 per month. This is the pearl of Click Funnels and this plan offers the heaviest firepower. Apart from getting all the basic features in the Basic plan, this package allows you to enjoy/leverage some of the best features around including:
Unlimited funnels and pages
Team members
Additional payment gateways (extra 6)
Additional custom domains (extra 6)
Unlimited follow up funnels (easily Connect and reconnect with your audience, even after they leave your funnel)
Priority support
Weekly peer review hackathons
Additional premium training courses on funnel building
Click Funnels Platinum gives you the ability and flexibility to create unlimited offers and unlimited growth.
Click Funnels Special Offer
When I first came across Click Funnels, I thought it was just another lead generation software.
Man, I was wrong. This lead gen software had helped me close more sales than me and my team ever did. And I cannot be more thankful to Russel and his team for this.
The Click Funnel pricing is very straightforward but I want to be honest with you. Click Funnels might not be for you.
So, I recommend you to grab the free 14-days trial using Click Funnels and decide for yourself. Remember that a sales funnel is always effective when you are sending decent traffic to the funnel.
Read This If You Are Thinking Twice About Getting Click Funnels
I know you might doubt Click Funnels and how it can turn your business from down there to up in the pinnacle. I had the same concern too before falling in love with the software.
Here’s what I had learn and I hope these help you in the decision making:
Thinking a hundred times is not going to chance the fact that you probably need a new lead generation software
There is absolutely no risk because you get a full 14 days trial at no cost to you (none at all, nada)
There are many other lead generation software in the market, but none of them are offering a comprehensive solution like what Click Funnels are doing
So, the choice is yours. I recommend you to get started right now because if you don’t, your competitors might be!
Young at heart and a deep passion for entrepreneurial success, Reginald is devoted to share everything he had learned about online marketing with the public. Follow him for more awesome postings.
Share on facebook
Share on twitter
Share on linkedin
Share on whatsapp
Share on reddit
Should I Start A Blog Now?
You are at home and probably under quarantine by the government because they wanted to stop the epidemic of the Covid-19 virus. You had heard and read financial experts talking about the great recession in 2020 and you are dead worried. How do you cope up with the financials? Lucky for you, read this post and I’ll show you two powerful strategies to beat the upcoming recession … but you need to take action right now.
Do you know that starting a blog is also a good way to build passive income during hard times? Here’s the thing.
Starting a blog been a long wish for you and you heard about bloggers making money online.
“Is this the best time to start a blog?” You thought to yourself.
The answer is probably a resounding “yes”.
The best time to start a blog is right now. Scroll down to learn how to get started right now.
Step By Step To Launch Your First Blog
If you want to start a blog, follow these steps and I’ll show you exactly HOW you can start a blog under $30 or less.
And under 60 minutes.
Deal?
1. The basics
The basics includes finding a topic that you are super interested with. It can be something boring or something scientific. It doesn’t matter.
You need to be passionate about the topic.
Once that is done, head over to BlueHost to get yourself a domain name and web hosting.
Why BlueHost?
BlueHost offers free domain name, 1-click WordPress installation, superior uptime and above everything affordability. It costs you under $4 a month and there is no better offer than this!
Here’s the beauty of using BlueHost for your web host. It is close to automatic and support is just a click away. Right after setting up your domain name and hosting, you should be ready to setup your WordPress blog.
This step includes:
Installing a WordPress theme (find free ones from the WordPress respository)
Installing essential WordPress plugins
If anyone had told you that starting a blog is complicated, they are dead wrong. It is a simple 2-step process as above.
Step 3: Publish your first content
Now that your blog is up and running, you need to publish your first content.
Forget about what others had said about SEO and stuffs. You just need to be yourself and share information based on what you know.
A wide range of topics could include:
The top 10 things you didn’t know about [your interest]
How to start [your interest] under X days
The ultimate guide to [your interest]
The sky is your limit. So, don’t be afraid to go overboard!
4. Informing Google
The last step is where many beginners make the same mistake. There are millions of blogs and Google takes time to discover them all.
To fast forward the ‘application’ and ‘signal sending’ process, make sure you register your blog with Google Analytics and Google Search Console.
When you do this, you are telling Google that your blog is new (and it exists) and they need to take at your blog right now!
Summary: 4 Steps Simple Process To Start A Blog Right Now
I had said this a zillion times now. There is no better time to start a blog than now.
With recession and all the economy woes coming our way, we need to step up and take financials into our own hands. And you need to take action right now.
Bonus: Two free masterclasses to help you prepare for the great recession in 2020
Recession is coming and you need to be ready. Today, I want to help you get started—and here are two free offers for you right now.
Young at heart and a deep passion for entrepreneurial success, Reginald is devoted to share everything he had learned about online marketing with the public. Follow him for more awesome postings.
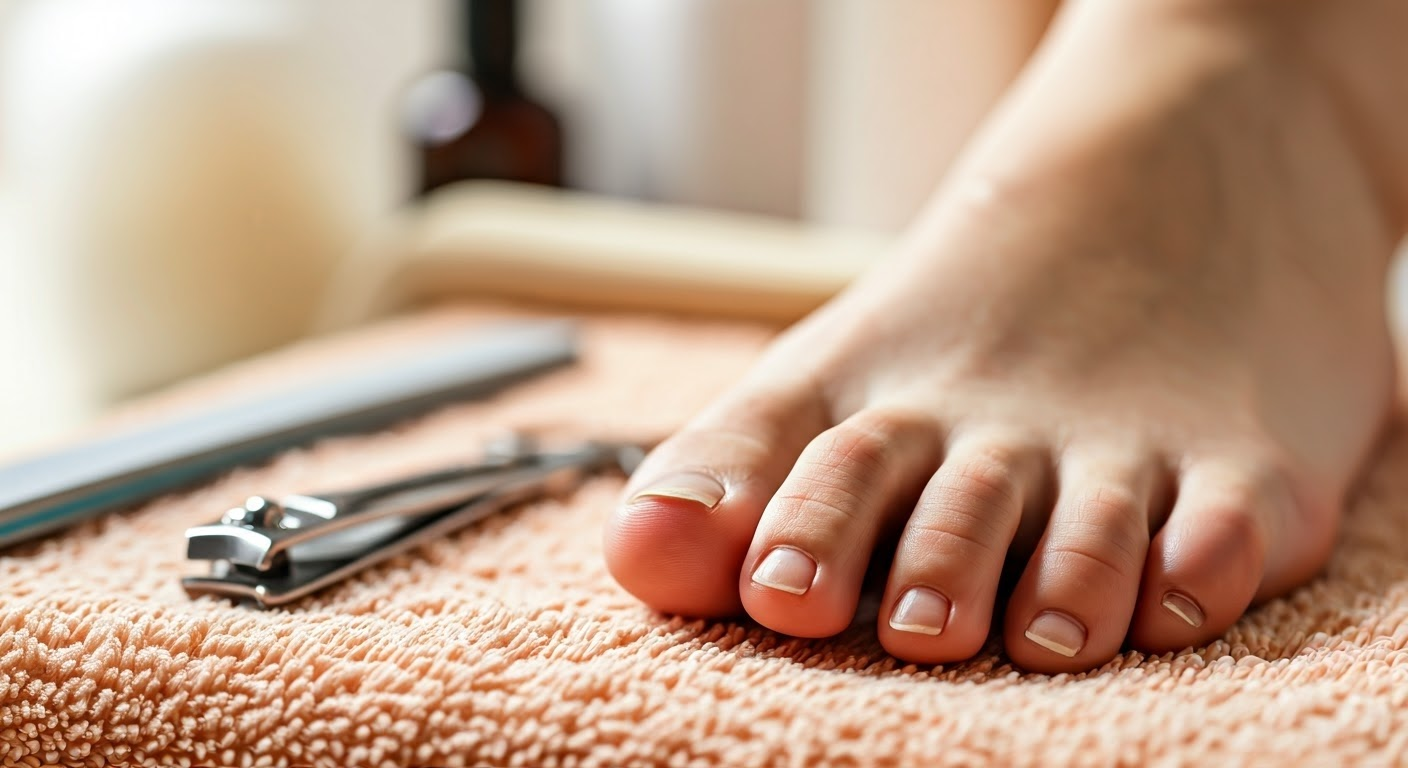
Trimming your toenails correctly is important to stop ingrown toenails and keep your feet healthy.
Always use clean and sharp toenail clippers. Do not use regular scissors.
Try to cut your toenails straight across while leaving some of the white edge.
Do not cut your toenails too short or round the corners, as this can cause painful ingrown nails.
If you have any worries or often have problems with your toenails, see a podiatrist.
Introduction
Taking care of your feet is very important. This includes trimming your toenails the right way. It might seem easy, but cutting your toenails wrong can cause painful problems. One common issue is ingrown toenails. This happens when the nail grows into the skin around it. This guide will show you the safest and best way to cut your toenails. You only need simple tools like nail clippers. This way, you can keep your nail bed healthy and avoid problems.
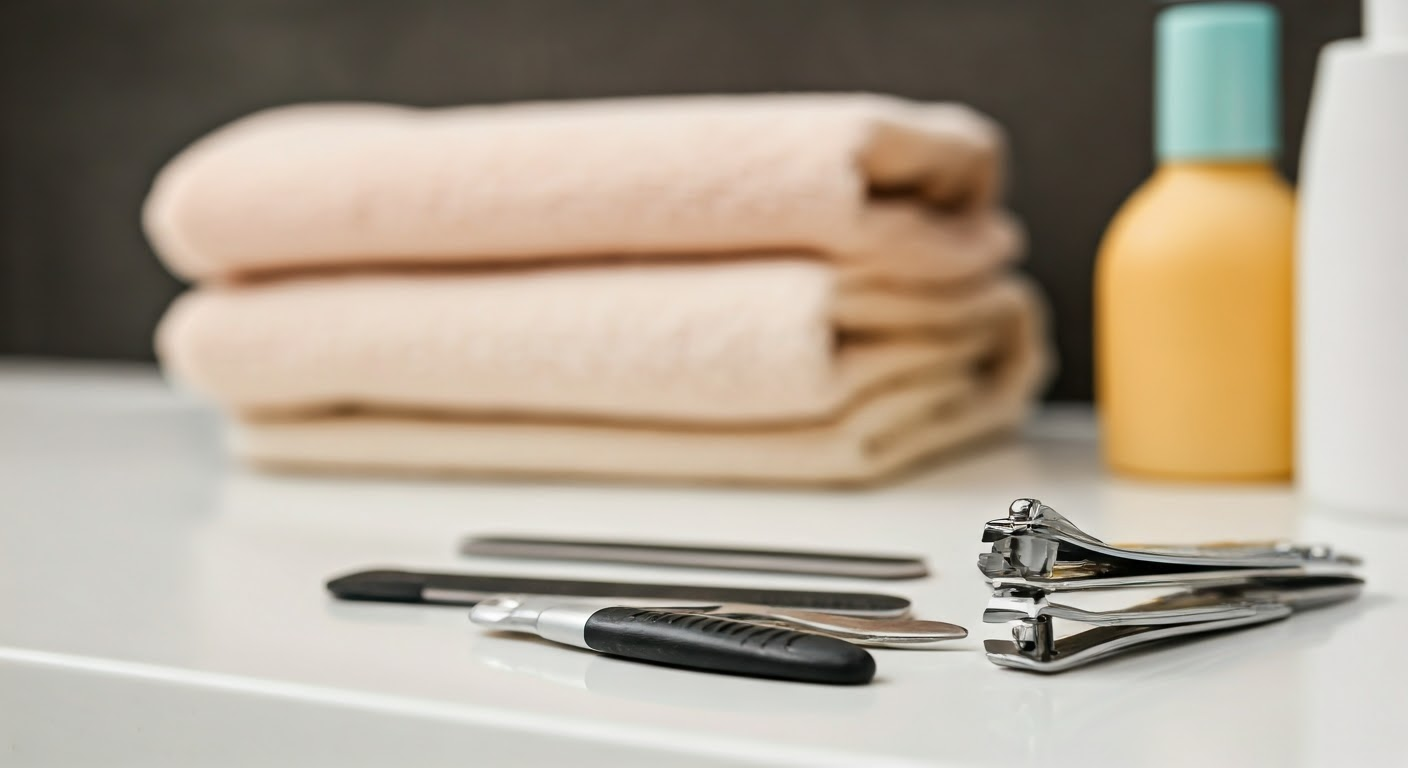
Essential Tools for Cutting Toenails Safely
Before you start, it’s important to get the right tools. Having good equipment can help a lot and lower the chance of problems. Using tools that don’t work well, like dull scissors, can cause jagged edges or uneven cuts. This can increase your risk of getting an ingrown toenail.
It is very important to invest in a good pair of toenail clippers. Choose clippers made for toenails because they are stronger and can handle thick nails. Also, keep your clippers clean by washing them with soap and water or using rubbing alcohol. This will help stop bacteria from spreading.
Choosing the Right Clippers for Your Toenails
When you pick toenail clippers, think about the size and shape that are best for you. Bigger clippers give you better leverage for thick toenails. Clippers with a straight edge help you get a clean, straight cut.
Choose clippers made from stainless steel. They are strong and easy to clean. Do not use fingernail clippers on your toenails. They are usually too small and can make your nail crack or split.
Using the right tools is the first step to safe toenail trimming. If you get the right toenail clippers and keep them clean, you can keep your feet healthy and reduce the chance of painful ingrown nails.
The Importance of Nail Files in Your Toenail-Cutting Kit
Besides clippers, a nail file is another important tool. It is sometimes called an emery board. A nail file helps smooth out rough edges left after trimming. This can stop snags on socks and reduce the risk of getting an ingrown toenail.
When picking a nail file, choose one with fine grit. This helps to protect your nails. Glass or crystal files are easier on your nails compared to metal ones. They can also be cleaned easily. After trimming your nails, run the file along the edges in one direction to smooth them out.
Using a nail file in your routine can give you a better look and feel. It also helps keep your feet healthy.
Preparing Your Toenails for a Safe Trim
Proper preparation before trimming your toenails is very important for a clean and safe cut. Just like you soften your hair before a haircut, getting your toenails ready helps make them flexible. This way, they are less likely to crack or split when you trim them. This is especially helpful for people with thick or brittle nails.
Also, setting aside a specific time and space for your nail care can make it more fun and easier. Collect all your tools in advance to avoid breaks, and make sure you have good lighting. This will help you clearly see what you are doing.
The Best Time to Cut Your Toenails
Choosing the right time to cut your toenails may seem small, but it can make a difference. It is best to trim your toenails after a bath or shower. This is when your nails are soft from the warm water.
Soft nails are easier to cut. This means you need less force, and you are less likely to crack or split them. If you like to cut dry nails, make sure your clippers are sharp to avoid hurting the nails.
Also, do not hurry when trimming. Set aside enough time to do it right. Focus on the process, so you do not make mistakes or hurt yourself. Remember, being calm and patient is important for safe and good toenail trimming.
How to Soften Toenails Before Clipping
Soaking your feet in hot water for about 10 to 15 minutes is a great way to soften your toenails. The heat and moisture help make the nails softer, especially if they are thick or hard. You might want to add a few tablespoons of Epsom salts or essential oils to the water. This can enhance softening and make you feel more relaxed.
After soaking, dry your feet gently with a clean towel. Be sure to focus on the areas between your toes. This helps remove extra moisture and stops the clippers from slipping while you trim.
It’s important to soften your nails well, especially the big toe. The big toe usually has the thickest nail, which can split easily if you cut it without softening first.
Conclusion
To keep your toenails healthy, follow these simple steps for a safe trim. First, choose the right clippers and nail files. Soften your nails before you cut. It’s also important to know the best time to trim your nails. Cutting toenails the right way can help stop infections and ingrown nails. If you have diabetes, be extra careful when you cut your nails. By following these easy tips, you can keep your toenails strong and healthy. If you want more advice or help, check out our frequently asked questions section for more information.
Frequently Asked Questions
How often should I cut my toenails?
The way often you trim your toenails can change based on how fast they grow. The American Academy of Dermatology suggests trimming them as needed, usually every 6 to 8 weeks. It’s also a good idea to keep up with your foot health care. Talking with a healthcare professional about your treatment options is encouraged.
What angle should I cut my toenails to avoid ingrown nails?
To stop ingrown nails, use your nail scissors the right way. Always cut straight across the nail. Don’t trim the corners, as this can make the nail grow into the skin around it. Knowing how to use the right technique is very important.
Can cutting toenails incorrectly lead to infections?
Incorrectly cutting toenails can lead to openings for bacteria and fungi to enter. This issue is worse for people who have health problems like diabetes. Diabetes can lead to circulatory problems and nerve damage, making infections more likely.
Is it safe to cut all toenails the same length?
It’s okay to try to make all your toenails the same length. But keep in mind that each toenail is different. You should think about the shape of the nail and any health information. Always use separate clippers and a straight edge for each toenail. If you’re unsure, it’s a good idea to talk to medical professionals.
Tips for people with diabetes cutting their toenails
Diabetes can make it hard to care for your toenails. If you have diabetes, it’s a good idea to talk about toenail cutting with your health care team. They can give you a helpful guide on safe ways to do it and what treatment options are available. This will help you get the best care for your needs.
Trimming your rabbit’s nails is crucial for their health and well-being, preventing discomfort and potential injuries.
Overgrown nails can curl, break, or hinder your rabbit’s mobility, affecting their quality of life.
Having the proper tools, such as specialized rabbit nail clippers and styptic powder, is essential for safe and effective trimming.
Rabbits, like cats and dogs, have a vein called “the quick” in their nails; cutting into it should be avoided.
Regular nail trims, typically every 4-6 weeks, are necessary to maintain your rabbit’s nail health.
Introduction
Nail trimming is very important for taking care of rabbits. Wild rabbits keep their nails short by digging and finding food. But pet rabbits need regular trims. If their nails get too long, it can hurt them and cause health problems.
Understanding the Importance of Nail Trimming for Rabbits
Keeping your rabbit healthy is about more than just what they eat and how much they play. You also need to trim their nails regularly. If their nails get too long, it can become a big problem for their health.
Long nails can curve inward. This can hurt your rabbit’s paws and make it hard for them to move around. The nails can also break or tear, which might cause bleeding and lead to infections. If you don’t trim their nails, it can change how they hold their body. This can lead to joint pain and problems with their back over time.
The Health Risks of Overgrown Nails
Rabbit nails, like ours, have a blood supply inside them. This area is called “the quick,” and you can see it clearly in light-colored rabbit nails. If you cut into the quick, it hurts the rabbit and can cause bleeding.
The front feet of a rabbit have five nails each, including a dewclaw. These nails can easily become a problem if they grow too long. If you ignore them, the nails may get long enough to affect how the rabbit hops. This makes it hard for them to move comfortably.
Trimming rabbit nails regularly helps stop the quick from growing too far into the nails. This makes it easier to trim them in the future and lessens the chance of cutting into the blood supply.
How Nail Length Affects Rabbit Behavior and Well-being
Long nails can really change how rabbits act and feel. You may notice your rabbit having trouble jumping or not wanting to move as much as before.
The back feet, which have four nails each, can also cause problems with how they move. If the back nails grow too long, it can affect their balance. Your rabbit might show stress or frustration because of the pain from their nails.
By trimming your rabbit’s nails regularly, you help them feel more comfortable. This way, they can be active and behave naturally.
Preparing to Trim Your Rabbit’s Nails
Before you start nail trimming, make sure you have the right tools ready. It’s also good to create a calm space. This helps to lower stress for you and your bunny.
Getting ready is important for a simple and easy nail-trimming session for you and your bunny.
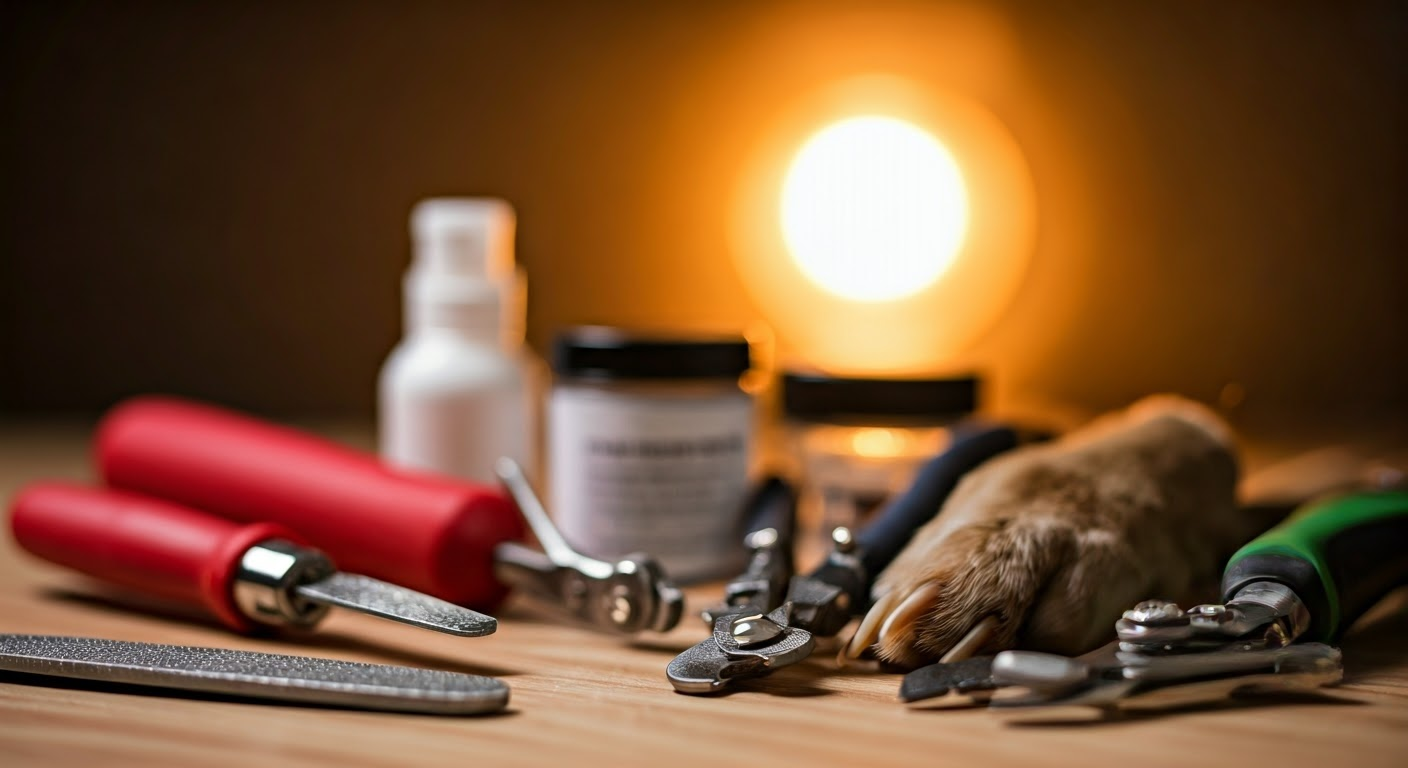
Essential Tools for Safe Nail Trimming
Gathering the necessary tools beforehand will help you navigate any unexpected situations during nail trimming.
Tool
Description
Specialized rabbit nail clippers
These clippers are designed for the shape and size of rabbit nails, offering better control and precision.
Styptic powder
In case you accidentally clip the quick, styptic powder helps stop bleeding quickly.
Towel
Provides traction and comfort for your rabbit, helping them feel safer.
Treat
Use as positive reinforcement after trimming.
While human nail clippers might seem convenient, they are not designed for the thickness and round shape of a rabbit’s nails and could cause crushing or splintering.
Creating a Calm Environment for Your Rabbit
A calm rabbit works well with you. Before you trim their nails, choose a quiet place where your rabbit feels safe. Stay away from loud noises or anything that might distract them.
Lowering the lights and talking softly can help your rabbit relax. Positive reinforcement can also make a big difference.
Keep their favorite healthy treats close. Reward your rabbit during the process for being helpful.
The Beginner’s Guide to Rabbit Nail Trimming
Trimming your rabbit’s nails for the first time can be scary. However, if you are patient and follow the right steps, it can be easy and not stressful for you or your rabbit.
It is important to stay calm during this time. Your rabbit can feel how you are feeling. So, being calm and gentle will help a lot.
Step 1: Gently Restraining Your Rabbit
Restraining your rabbit doesn’t mean making them feel uncomfortable. It just means holding them safely so you can trim their claws.
A good way to do this is by asking someone to hold the rabbit against their chest. Make sure the rabbit’s back is pressed gently against their body. You can also put the rabbit on a table that has a towel on it to stop slipping.
Always remember not to press down on their back or lift them by their feet. This can hurt them badly.
Step 2: Identifying the Quick in Rabbit Nails
The quick is the blood vessel in your rabbit’s nail. If you cut into it, your rabbit will bleed and feel pain. You can see the quick in rabbits with lighter-colored nails because it looks like a pink stripe.
For rabbits with dark nails, use a flashlight to find the quick. Shine the light behind the nail to see the quick as a darker spot.
Be careful when trimming near the quick. Remember, it can go further down in longer nails.
Step 3: Tips for Clipping Without Causing Harm
When you clip your rabbit’s nails, always use a sharp nail trimmer made for pets. This helps you get a clean and smooth cut. Do not use human nail clippers because they can crush the nail. This can cause pain and lead to infections.
Hold the clipper straight across the nail and cut only the tip, staying well below the quick. It is better to trim a little bit often instead of taking off too much at once.
If your rabbit has long nails, you may need to trim them in stages. This will give time for the quick to move back gradually.
Step 4: Rewarding Your Rabbit Post-Trimming
Positive reinforcement is important for making nail trimming easier in the future. After you clip your rabbit’s nail, give them praise and their favorite treat right away.
This positive experience shows your rabbit that nail trimming can be good. It also helps them relax after what may have been a hard time.
When you create a good experience with nail trims, your rabbit will be less likely to resist next time.
Dealing with Common Nail Trimming Challenges
Even when you prepare well, problems can still happen during nail trimming. Knowing how to deal with them quickly and calmly is important.
Whether it’s when you accidentally cut the quick or have a lively bunny, being ready will help you keep things from getting worse.
How to Stop Bleeding if You Clip the Quick
Even skilled rabbit owners can accidentally cut too close to the quick. If this happens, stay calm. The bleeding may look serious, but it is usually easy to manage.
Be ready with your styptic powder. Use a cotton ball or your fingertip to press gently on the bleeding nail tip. The styptic powder helps the blood to stop flowing quickly.
After the bleeding slows down, give your rabbit a treat to distract them. Keep an eye on the nail for a little bit to make sure the bleeding does not start again.
What to Do When Your Rabbit Resists Trimming
Some rabbits are better at handling nail trimming than others. If your rabbit struggles, squirms, or seems upset, do not force it to continue.
Stop trimming and try to calm your rabbit. You can speak softly, gently stroke their fur, or give them a favorite toy to keep them distracted. If your rabbit still resists, think about getting help from a veterinarian who knows about rabbits or a professional groomer with experience in handling them.
Remember, it is important to be patient when dealing with how rabbits behave. It is always best to focus on your rabbit’s well-being instead of rushing the process.
Maintaining Your Rabbit’s Nails Between Trimmings
Maintaining your rabbit’s nails goes beyond just trimming them. You can include activities that help their nails wear down naturally. This can make the time between trims longer.
A balanced lifestyle is important for your rabbit’s health. It affects their well-being, including how healthy their nails are.
The Role of Diet and Exercise
A good diet is very important for a rabbit’s health, more than most people think. A diet high in hay helps to keep their nails naturally trimmed.
Give your rabbit plenty of room to hop, run, and play. This is good for their body and helps wear down their nails too. You can also provide a safe box with shredded paper or cardboard for them to dig in.
By creating a space that feels like their natural home, you help them live a healthier and happier life.
Encouraging Natural Nail Wear
In the wild, rabbits wear down their nails by digging, searching for food, and exploring different areas. You can help your pet rabbit do the same safely.
Give them rough surfaces to walk and hop on, like wooden boards that are not treated, seagrass mats, or concrete slabs. These surfaces help keep their nails worn down naturally.
Keep in mind, the more natural wear you encourage, the less often you will have to cut their nails.
Conclusion
Regular nail trimming is important for your rabbit’s health. Long nails can cause health problems and affect your pet’s behavior. You can trim your rabbit’s nails safely by making a calm space, using the right tools, and following good methods. After trimming, reward your rabbit to encourage good behavior. A balanced diet and chances to naturally wear down nails can help between trimmings. If you face issues like bleeding or your rabbit not wanting to cooperate, get advice quickly. Keep your rabbit’s nails well cared for to make sure they are comfortable and happy.
Frequently Asked Questions
Can I Use Human Nail Clippers on My Rabbit?
It’s not a good idea to use human nail clippers or scissors on your rabbit. Rabbit toenails are round, while human clippers are made for flat nails. Using the wrong clippers can crush or split the nails. This can cause your rabbit pain and may lead to infection.
How often should I trim my rabbit’s nails?
The number of times you should trim a rabbit’s claws can be different for each rabbit. However, a good rule is to do it every 4-6 weeks. You should also check your rabbit’s claws often. Look for signs that they are too long, like curling or stretching beyond the fur.
What tools do I need to safely trim my rabbit’s nails?
You will need some nail clippers made just for rabbits (or small animal clippers). You should also have styptic powder ready, in case you accidentally cut too deep. A towel can help you get a better grip and keep your rabbit calm.
Are there specific techniques for restraining a rabbit during nail trimming?
The main thing is to keep the rabbit calm and comfortable. You can have someone help you. They should gently hold the rabbit or wrap it in a towel. Make sure to leave one foot out at a time.
How can I tell if my rabbit’s nails are too long and need trimming?
Check your rabbit’s nails often. If they stick out past the fur on their paws or start to curl, it’s time to trim them. Make sure to look at their nails regularly to see how long they are.
Trimming your dog’s black nails may seem hard, but with the right tools and approach, it can be safe and easy for you both.
It is important to know your dog’s nail structure and see the signs of the quick. This can help you avoid cutting the sensitive part, which can cause bleeding and pain.
Using good tools like sharp dog nail clippers and styptic powder for any cuts can improve the process a lot.
Make your dog comfortable by handling their paws, finding a good position, and using positive reinforcement. These are all important for a good nail trimming experience.
If you are ever unsure about clipping your dog’s black nails, you should ask a professional groomer or veterinarian for help and advice.
Introduction
Clipping black dog nails for the first time can seem tricky, but it doesn’t have to be hard. With some good tips and a calm mindset, you can trim those dark nails without stress for your furry friend. This guide will give you simple steps. You will learn about the structure of dog nails and how to pick the best nail trimmer. This way, you can have a safe and happy nail-clipping time for you and your dog.
Understanding the Basics of Black Dog Nails
Black dog nails can be tough for pet owners. This is because the quick, which is the sensitive part of the nail with blood vessels and nerves, is hard to see. If you cut into the quick, it can cause pain and bleeding. This may make your dog afraid of getting their nails trimmed in the future.
But, if you learn about the structure of your dog’s nails, you can find the safe area to cut. This can really help. With patience and encouragement, you can become good at clipping black dog nails without causing stress.
The Anatomy of a Dog’s Nail
A dog’s nail is not just a hard part. It has two main parts: the nail and the quick. The nail is the tough part we can see and trim. It is made of keratin, like our own nails, and does not have nerve endings.
The quick is the soft, pink part inside the nail. It contains a blood vessel and nerve. If you cut into the quick, it can hurt and bleed. This can cause stress for both you and your dog. So, it is important to be careful, especially with black nails.
When trimming, just cut the tip of the nail. This part does not have the quick, which keeps your dog from feeling pain. Each time you trim, check the surface to look for signs of the quick and always be cautious.
Recognizing the Quick in Black Nails
Dark nails can make it hard to see the quick, which can feel scary. But there are some signs that can help. When trimming black nails, start by clipping small pieces from the tip of the nail.
After each clip, look at the cut surface. As you get closer to the quick, you may notice a black spot in the center of the nail. This shows you are getting close to the blood vessel. Stop trimming right away if you see it.
If you keep trimming, the next thing to look for is a grayish or pinkish, moist area. This means you are at the start of the quick. At this point, any further cutting will reach the quick, so it’s good to stop here.
Essential Tools for Clipping Black Dog Nails
Before you start clipping your black dog’s nails, it’s very important to have the right tools. Just like a worker needs good equipment, using the right and high-quality tools can make nail trimming easier and safer.
Get a good pair of dog nail clippers that fit your dog’s nail size and type. You should also have some other important supplies on hand, like styptic powder. This powder can help if you accidentally cut too close and nick the quick.
Choosing the Right Clippers
Choosing the right dog nail clippers is very important for a safe and comfortable trim. There are two main types of clippers: guillotine clippers and scissor clippers.
Guillotine clippers have a hole where you put the nail, and a blade that slides to cut it. They are usually easier to handle for small to medium-sized dogs. Scissor clippers look like scissors with a curved blade made for trimming nails. They give you more control and strength. This makes them better for larger dogs or thicker nails.
When you choose clippers, think about your dog’s size and nail thickness. Pick high-quality clippers with sharp blades for a clean cut. This will help reduce pressure on the nail. If you are not sure which to choose, talk to your veterinarian or a professional groomer for advice.
Other Must-Have Supplies
To make nail trims safe and easy, you should have a few extra items besides clippers:
Styptic powder or cornstarch: Sometimes, mistakes can happen. If you accidentally cut the quick, use styptic powder or cornstarch to stop the bleeding. Just put a little on the nail and apply gentle pressure for a few seconds.
Nail file: After you trim the nails, use a nail file to smooth out any sharp edges. This will stop snags on furniture or fabric. Filing gently can also help your dog feel more comfortable.
Treats: Giving treats is a great way to encourage good behavior! Keep your dog’s favorite treats nearby and give them out during the nail trim to make the experience more positive.
Having these supplies ready can help you handle any issues that come up. Remember, being prepared is important for reducing stress for both you and your dog.
Preparing Your Dog for Nail Clipping
Before you think about using the clippers, it’s important to get your dog ready both physically and emotionally. This helps make nail trimming a good experience. You need to keep them comfortable and help them see it as a positive thing.
Start by getting your dog used to having their paws touched. Touch and hold their paws gently on a regular basis. Give them treats and praise when they are calm. Next, show them the clippers slowly. Let them sniff and look at the clippers while you give them treats to create a good feeling. This way of gradually introducing the clippers helps your dog trust the process and feel less anxious about nail trims.
Getting Your Dog Comfortable
Creating a calm and comfy environment is very important when getting ready for your dog’s nail trims. Pick a bright place where you can both feel relaxed. If your dog has a favorite spot, like their bed or a special rug, set up there.
Before you start, do something relaxing, like gentle petting or a short play session. This helps your dog feel happy and less anxious. During the nail trim, use a soft and kind voice. Give positive reinforcement too, with praise and yummy treats, to reward good behavior and build a positive connection with nail trims.
Always remember to be patient and understanding. If your dog seems stressed, stop and try again later. Your dog’s comfort and well-being are the most important things.
Handling Your Dog’s Paws
Include regular paw handling in your daily time with your dog. When you pet them, lightly touch and hold their paws for a few seconds. Reward their cooperation with praise and treats.
Slowly make these paw handling sessions longer as your dog gets used to it. Practice pressing on their paw pads gently to extend their nails. This mimics the feeling of trimming. Building friendly feelings about paw handling is important.
Every time you handle their paws, be gentle and watch your dog’s body language. Don’t force their paws into positions they don’t like or hold them tightly. This could cause bad feelings and make nail trims harder in the future.
Step-by-Step Guide to Clipping Black Dog Nails
Now that you have your tools ready and your dog is prepared, it’s time to trim the nails. Patience and a steady hand are very important, especially when you can’t see the quick clearly. Follow these steps to make the process easy and safe.
Before you start, take a deep breath and calm yourself. Your calm energy will help your dog feel relaxed. Also, remember to reward them often for good behavior during the trimming.
Step 1: Position Your Dog Safely
The first step is to find a safe and comfy spot for your dog. Make sure they feel relaxed and secure. If your dog is small, you can put them on your lap, with their back to you. For bigger dogs, sit on the floor next to them or let them stand in a way that’s easy for them.
If your dog is new to nail trims or feels nervous, you can use gentle ways to hold them. Ask a family member or friend to help hold your dog while you trim their nails. An extra pair of hands is helpful, especially when you’re working with black nails.
Don’t forget to use positive reinforcement during this time. Give treats, praise, and comforting words to make this a good experience for your furry friend.
Step 2: Identifying Where to Cut
With your dog in a comfortable position, it’s time to find the safe area for cutting. Hold your dog’s paw gently but firmly. Look for the nail you want to trim and check it carefully. Since the nail is black, you can’t see the quick.
Start by cutting a very small piece at the end of the nail, using the clippers straight against the nail. As you make each small cut, keep an eye on the cut part of the nail. Don’t cut into the curve of the nail. This could make it easier to hit the quick.
Watch for a small black spot in the center of the nail. This shows you are close to the quick, so stop trimming that nail. When dealing with black nails, it’s best to be cautious.
Conclusion
Clipping your black dog’s nails takes patience and care. You need to avoid cutting the quick, which can hurt your dog. It helps to know how a dog’s nails are built before you start. By using the right tools and following a simple guide, the process can be easy and less stressful for you and your dog. Stay calm and give your dog a treat when it behaves well. Taking care of nails is important for your dog’s health and comfort. If you have questions about clipping black dog nails, ask your vet or a professional groomer for help.
Frequently Asked Questions
How often should I clip my black dog’s nails?
To keep your dog’s nails from getting too long and to avoid discomfort, try to trim them when you hear the nails clicking on the floor. How often you trim will depend on your dog’s breed and how fast their nails grow. Most dogs usually need nail trims every 2 to 4 weeks. Regular trims can stop overgrowth and help the quick move back.
What if I accidentally cut the quick?
Accidents happen. If you cut into the quick and see your nail bleeding, don’t worry. You can apply styptic powder or cornstarch to the nail to help stop the bleeding. If you feel worried or if the bleeding doesn’t stop, you should talk to your veterinarian.
How can I safely restrain my dog while clipping their black nails?
If your dog does not like nail trims, have someone help you hold them still. Use calm and gentle movements. Do not push their paw into awkward positions. You might also want to ask a professional groomer or trainer for advice on safe ways to hold your dog.
What tools do I need to clip a black dog’s nails at home?
You will need a good pair of dog nail clippers. You can choose between guillotine or scissor style. You should have styptic powder or cornstarch to stop bleeding if it happens. A nail file is also important to smooth any rough edges. Some pet owners like to use a nail grinder too, as it can give a smoother finish.
What are the potential risks of cutting a dog’s nails too short?
Cutting a dog’s nails too short can cause pain and bleeding. This happens because you may cut into the quick, which has blood vessels and nerve endings. If this occurs, the dog might become scared of getting its nails trimmed in the future. To prevent this, regular trims are important. They help keep the quick from growing too far out.
Are there any alternatives to clipping a dog’s nails, such as grinding or filing?
Yes, there are other ways to clip nails instead of using traditional nail clippers. A nail grinder can be a great choice for dogs that have thick or tough nails. It works with a spinning head that grinds the nails down. Also, filing can help to shorten and smooth the nails. This method might take more time but is good for dogs that are scared of clippers.